The power of having your Microsoft Dynamics CRM system and Outlook closely integrated is well documented, but what happens if there is an issue. Dynamics CRM has a great out of the box connection with Outlook using the Dynamics CRM Outlook Client but occasionally it can go awry especially when it comes to syncing contacts.
Recently I was working with a client that had imported over 6,000 of their Dynamics CRM contacts into their Outlook (Exchange) contacts by mistake. This was a huge issue because the client had synced their phone to Exchange and the 6,000+ contacts where now appearing on their phone. We were able to follow these simple steps to resolve the issue and reduce the 6,000+ contacts to a more manageable 300 contacts.
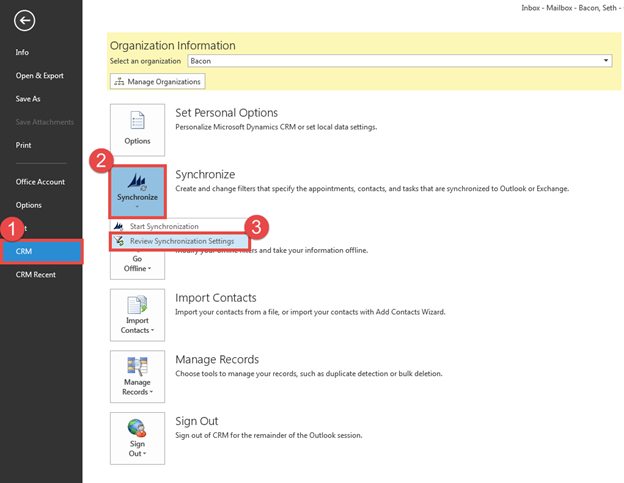
The first step was to update the filter that was dictating which Contacts should be synced between Dynamics CRM and Outlook. In Outlook go to File > CRM > Synchronization > Review Synchronization Settings (Filters).
Here you will see the list of all the records that are being synced. Locate and open the filter associated with Contacts.
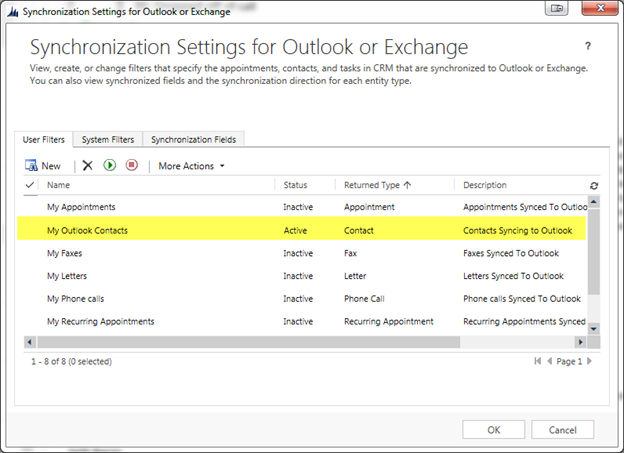
Here you will be able to update the filter using the same interface and logic you would doing an Advance Find. I find it helpful to actually try my logic in Advance Find before creating the filter so I can confirm my expected results.

After you have updated the filter logic, it’s now time to sync Dynamics CRM and Outlook with the new logic. Go to CRM in the ribbon and hit Synchronize with CRM.

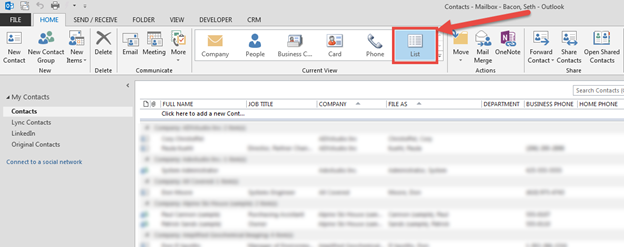
After it is completed, navigate to your Contacts (People) in Outlook. In the ribbon, select the List view in the Current View section so you can list of all your contacts.
Next you will want to save the view that you are about to create so you can come back to it later. Select the drop down arrow in the Current View section and select Save Current View As a New View… and name the new view Dynamics CRM Contacts.

Next we will need to add a column to display which contacts are currently being synced with Dynamics CRM. To do this right click on one of the column headers and select Field Chooser.
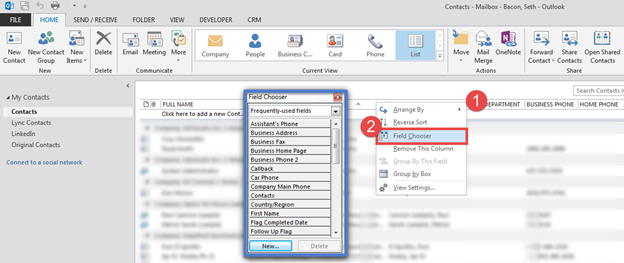
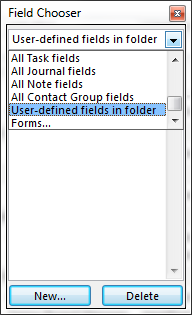
Next use the selector at the top to locate the “User-defined fields in folder” section and click new to create a new column.
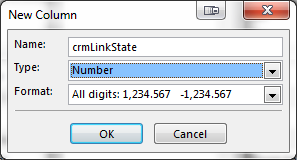
Name the column “crmLinkState” and set the Type to Number.
Now that we have the column created, drag the field to be the first column of the view. We now want to group all of the contacts based on if their sync status with Dynamics CRM. I find the easiest way to do this is by right clicking the column header and selecting Group By Box which will now show you how the list is being grouped.
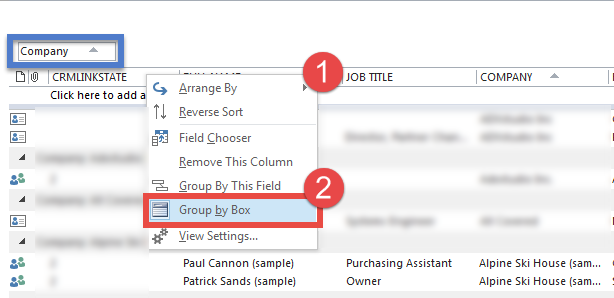
Go ahead and remove any existing group by fields by right clicking and selecting Don’t Group By This Field. Now right click CRMLINKSTATE (the newly created field) and select Group By This Field. If you collapse the groups, you will now will be able to quickly tell which Contacts are currently syncing with Dynamics CRM (2), those that have been synced from Dynamics CRM (0), and those that have never been synced with Dynamics CRM (none).
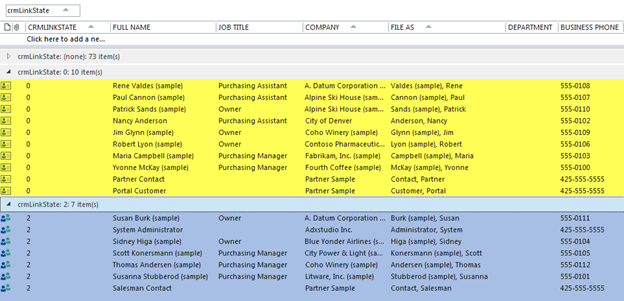
You can now easily locate and delete all of the old contacts from Dynamics CRM in the zero group. To remove contacts from your phone you will need to resynchronize your phone with Exchange. This may require you to go into your settings and turning the syncing off and on.
For information about additional Dynamics CRM fields in Outlook, I would recommend reviewing Jennyfer Mangaroo’s blog, Microsoft Dynamics CRM And Microsoft Outlook – What’s under the covers? Another blog that helped me with this issue was Bruce McCoy’s article CRM 2011 Outlook Client: Clean up your contacts.
Originally Posted on RSM Technology Blog on June 2015
